When setting out on any DIY or garden project it is always a good idea to make a list of the items you will be needing and the qualities that those items must possess to make your project a success. Judith knew exactly what she wanted and what she needed from both her shed and the foundation. Once she knew what she needed the correct research could be done and she could begin buying the right products. Read on to find out exactly what Judith was needing from her shed and base and what she decided to buy;
Jump To:
| The Project | The Work | Conclusion |
The Project
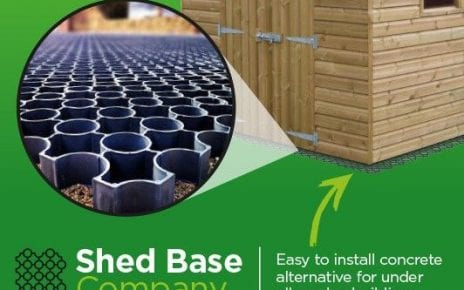
In this case study, Judith had recently ordered herself a new wooden Garden Shed and was looking for a suitable base for her new purchase to be installed onto. The area where she was going to install the shed was turf and soil so a solid base was needed before the shed could be delivered. After searching around the internet she found our website and began browsing our information pages to decide if our product would be best suited for her new shed. Judith needed:
- A strong base ✓
- Permeability and a little height to keep the shed away from wet ground ✓
- Best chance for her shed to avoid rotting ✓
- A base she could install herself ✓
- An affordable solution ✓
Judith ordered a 6ft x 4ft Plastic Shed Base Kit the same day she found our website and received the products 3 working days later, the bases are sent out in easy to manage boxes for you to move and store until installation day. Read on to see how Judith installed her Plastic Shed Base;
The Work
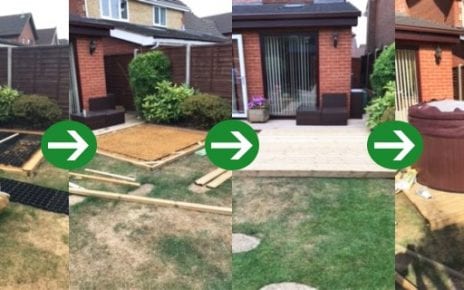
Judith began her project as most people do, by planning out which parts of the jobs to do and when. Firstly, she outlined exactly where the base and shed would be installed in her garden and proceeded to remove a small amount of turf from the entire area just so there was a slight hole where the base would comfortably sit.
Next, she laid the sheet of Shed Base Membrane which is included in our Shed Base Kits. Membrane sheets allow for any water to flow away naturally whilst acting as a shield and stopping any weeds or plants from growing up and through the base itself. The sheet is secured into the ground using Shed Base Membrane Staples, they keep the membrane in place to ensure there is no slippage at all when it is stood on and when the base is installed.
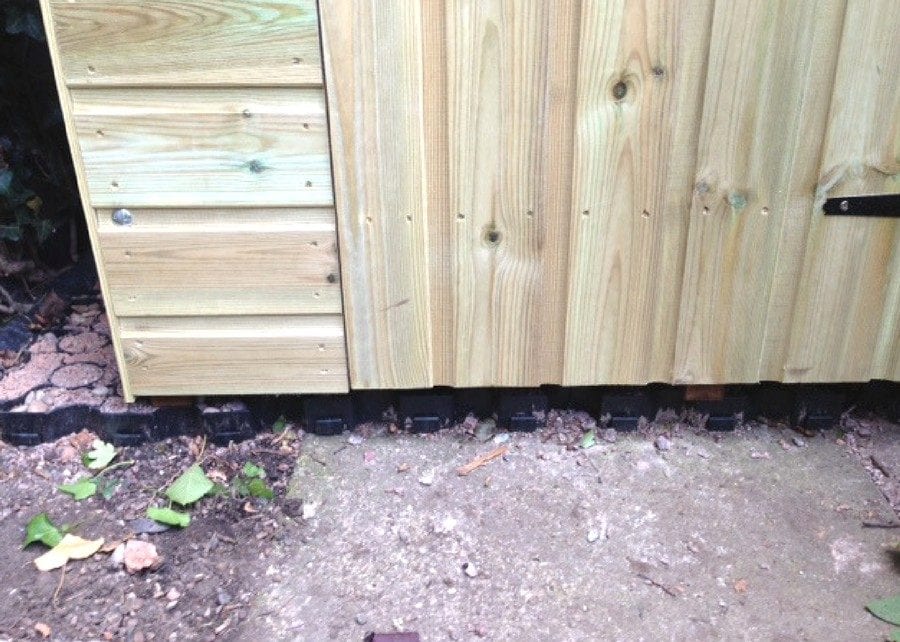
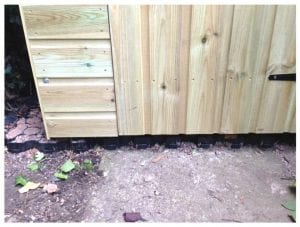
With the membrane in place and secured Judith could begin to lay the Plastic Shed Base. Starting in one corner, Judith laid one panel at a time and simply connected the panels together as she went along using the slot and peg system. This was the easiest part of the project Judith told us. Once the last panel had been installed Judith filled the full base with decorative gravel, we estimate that around 8kg of gravel is needed per panel.
Finally, now the base was installed and filled Judith’s new wooden shed could be installed on top of the plastic base.
Conclusion
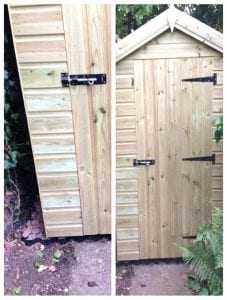
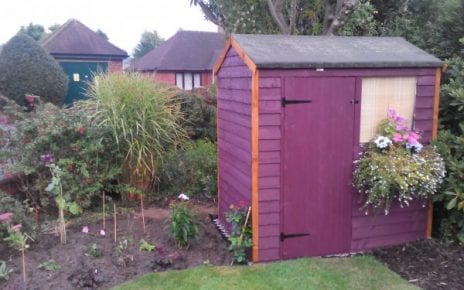
Judith is incredibly pleased with how her Shed and garden are now looking, we agree it looks fantastic! She also told us how easy the base was to install! On our base Judith’s shed is away from any damp soil and surface water as the panels allow water to drain naturally away and reduce the chance of rotting in the future.
“The shed went up today and the base was ideal! It was very easy to lay!”
We would like to say a huge thank you to Judith for using our base and for sending in the photos and information to create this case study. Should you have any photos to share with us or any questions then please do contact us.
As I am putting my shed on concrete base would the membrane be okay on top of panels or do I still need to fill with gravel?