With the feedback we have received from a few customers in the past we have decided to create a “How to Build a Plastic Shed Base” blog to help any customers who are thinking of buying or have already bought the base through the process of laying our incredibly strong and easy to lay base. Going through the entire project in simple steps listing each material needed, everyone can follow this guide to install their own base. Should there be any questions regarding the installation process that this guide has not answered for you then please do not hesitate to leave us a comment stating what else you would like to know. Happy base installing!
Jump To:
| Materials Needed | Preparing The Ground | Installing The Plastic Shed Base | Other Uses For The Base | Case Studies To Read | Video |
Materials Needed
There are a number of materials required to install a Plastic Shed Base when following our recommended method. From our website you can buy the following; a Plastic Shed Base (from 1 panel to 1,000,000 Panels), Geo-Textile Membrane, Membrane U-Pins and Shed Base Anchors. We also provide Non-Slip Rubber Shed Flooring Tiles should you want a walkway by your shed.
From any good builders merchant, you can buy these materials; Angular gravel or crushed aggregate which is used to create a sub-base. Decorative gravel is used to fill the shed base once it has been laid. Sharp sand is used to level off the sub-base to make sure the base will be stood on level ground.
Preparing The Ground
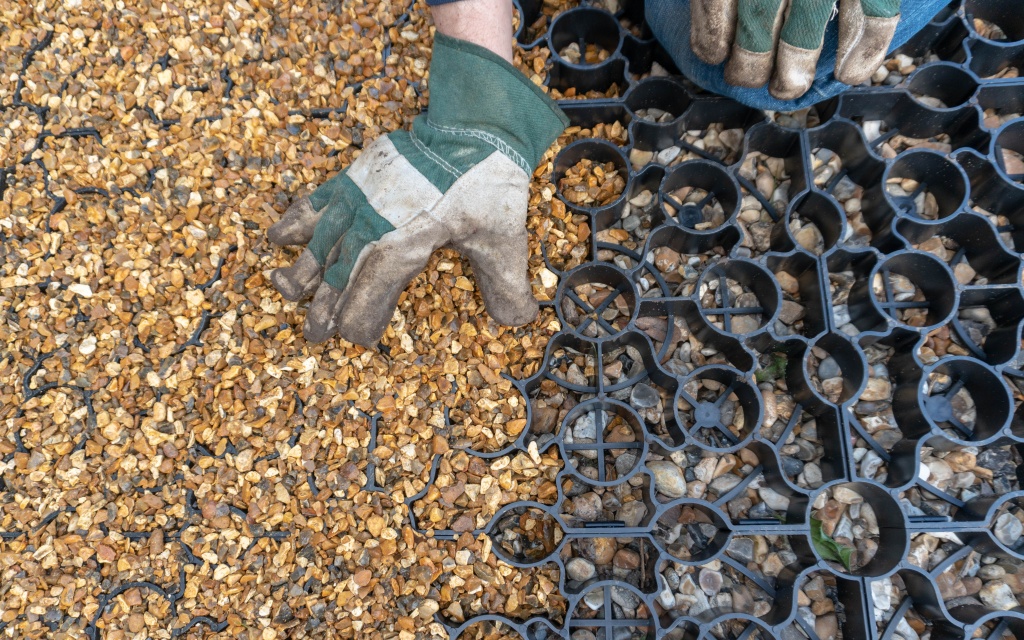
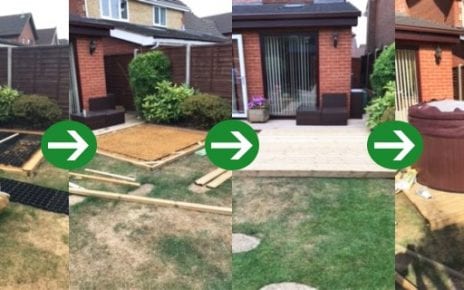
Ground preparation is a crucial part of installing a plastic shed base, without the correct preparation the benefits such as permeability will not be as effective. So, first of all, you need to decide where your shed will be going on your garden or allotment. Once you have decided, measure out the base and outline this in the turf.
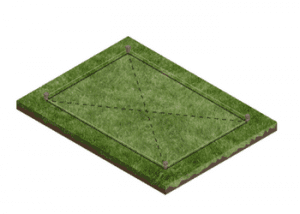
Next, remove the existing turf and soil from within the outlined area down to a depth of around 70mm and dispose of the waste responsibly. Digging down to 70mm allows for the base to sit flush with the remaining turf once the installation is complete. With the area now clear, lay down the sheet of membrane and secure it into the ground using the provided metal pins. The membrane is used to stop weeds from growing up through the base but still allows water to drain away naturally.
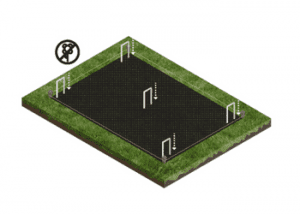
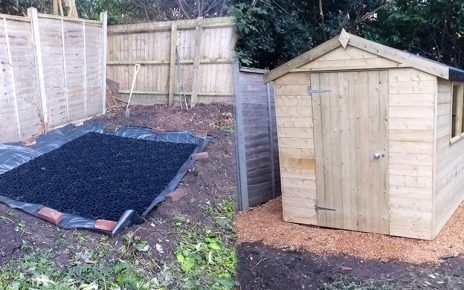
Finally, on top of the secured membrane, a bedding layer of between 5mm-20mm angular gravel or crushed aggregate approximately 30mm deep needs to be laid and compacted down very well to ensure the surface is level and hard. If the sub-base needs a little more material to level it out then we suggest using some sharp sand.
Installing the Plastic Shed Base
If you have used our product before you will agree with us that this is by far the easiest part of the entire project. We created our bases with strength, permeability and ease of use as our main objectives; which we have achieved. Our bases are delivered in easy to manage boxes so you can simply move them or store them until you are ready to install the base.
When you are ready to install the base, unpack all of the panels which arrive preassembled as 2ft x 2ft (4 panels) squares. From here start by placing the plastic shed base in one corner of the flat levelled prepared base area and simply click each panel together as you move away from the corners to create your required area.
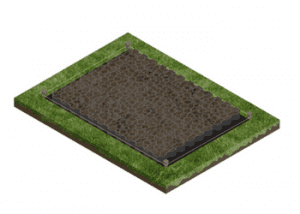
With the plastic shed base installed, fill all of the panels with suitable angular gravel or angular aggregate which will create a solid and flat surface on which to stand your shed or other garden building. The base is 40mm deep and will require around 8kg of gravel or aggregate to fill each panel.
Finally, backfill around the edges of your new base between the existing turf and the base with a 60:40 compost or soil sand and seed blend to make your new plastic shed base blend in with the rest of your garden or allotment.
Other Uses For The Base
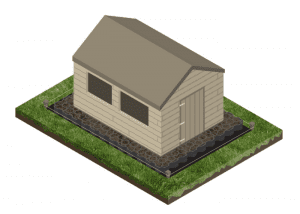
Despite the product name, our bases can be used for a number of garden buildings and other appliances.
In case you haven’t seen it already, we have a Greenhouse Base Customer Review Blog. This blog shows how well our bases perform under greenhouses as well as sheds.
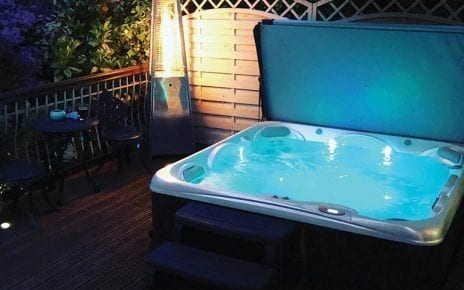
We have also had customers use our base under Storage Units, Log Cabins, Summerhouses, Play Houses and even Hot Tubs! We are incredibly proud of how versatile our base is and how it can be used as a foundation for almost any garden building!
Case Studies to Read
Should you still be struggling to decide whether or not to give our base a go, have a read of our customer review blogs to see how pleased our past customers are with their purchase of our fully recycled plastic shed base. Here is a full list of the case studies not mentioned already in this guide;
• Plastic Shed Base Under A Rabbit Kennel
• Plastic Shed Base A Year Later
Watch Our Video
Here is a video we have created using the illustrations above, watch it yourself here;
The ground on which we intend to install our shed base has some remains of roots left in it from ivy, pyracantha and mahonia that we have dug out.
Also nearby within a few yards are a Hawthorne and a pine tree. Will a plastic shed base be suitable in such an area.?
Thank you
Hi Shirley,
Thank you for you comment. As long as our installation guide is followed correctly then there should be no issue with using a plastic shed base in your set area.
Thanks,