When it comes to buying a relatively unknown product you can be wary of whether or not it will last as long as they suggest it will. If some visitors to our site have had that exact thought then this blog is for you. Gary, a customer of ours from 2016 called in earlier in the year with a friend and told us his story of him and his Plastic Shed Base. A year on and the base is doing fantastically well. Read on to learn more;
Jump To:
| The Story | Work Involved | Conclusion | Before and After Photo |
The Story
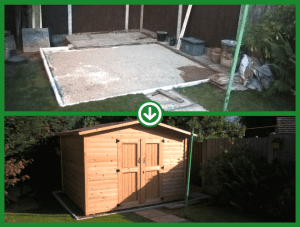
A customer of ours from last year brought a friend to us at the end of April this year so he too could buy a Plastic Shed Base. After speaking to them both for a good few minutes at reception, Gary told us how he had used our base under his shed and a year on how it was still looking great and performing excellently. Gary then proceeded to send us the photos from his phone of his base installation and a year on progression shot.
This just shows how well your products perform when a past customer recommends you to a close friend, over a year later! Thank you, Gary!
Read on to see Gary’s work and more photos;
Work Involved
Gary told us that the actual work involved with putting the base down was not too difficult at all. By simply following our Installation Guide he was able to prepare the ground, lay the base and fill it with gravel in just one day. The ground preparation is an incredibly important part of laying the base, without the correct prep work then the base cannot perform to its full capability. Gary completed the preparation and his base is still fantastic a year on.
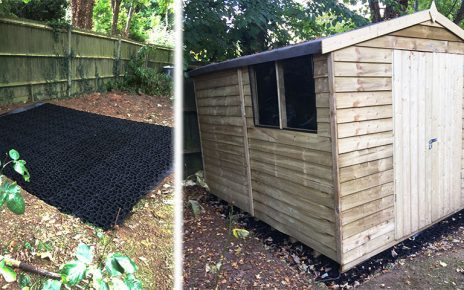
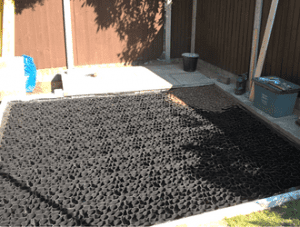
Gary started off by putting down a layer of hardcore and compacting this well. A sub-base of hardcore creates a solid base on which the base panels can be stood and will not move when weight is applied. Once the hardcore has been compacted down thoroughly, he began to lay his plastic shed base. Starting in one corner and attaching each panel together as he went along, Gary quickly moved around the base area and in no time at all had the base panels all installed.
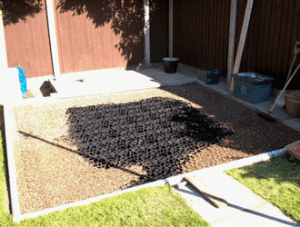
Finally, with the panels installed, Gary began to fill the base with decorative gravel which can be bought from any good builders merchant. Around 8kg of gravel is needed to fill each panel of the shed base so keep that in mind when buying the filling for your base. With the base full Gary could then simply install his shed and begin using it as he pleased without worrying about how the base would perform.
Conclusion
Gary was and still is incredibly happy with his plastic shed base. Still supporting his shed and allowing surface water to flow naturally away a year later.
“Hi, I am a recent customer of your Plastic Shed Base product (from 2016).
I thought you may appreciate some pictures of another successful installation. We are very happy with the finished project.
Regards,
Gary”
A huge thank you to Gary both for the photos and information to create this case study and also for recommending us to a close friend of his. Should you have any images or information to share with us or a question regarding our product then please do not hesitate to contact us.
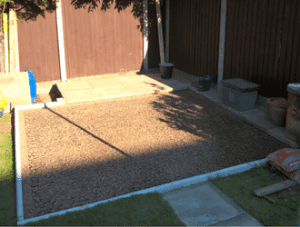
Before and After Photo