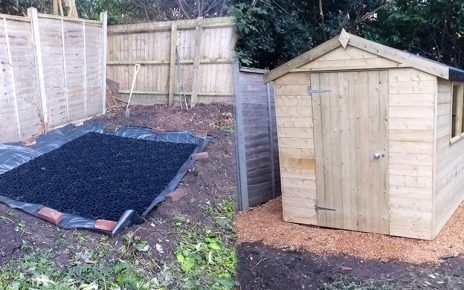
This case study comes from Mike who was looking to relocate his wooden shed from one side of his garden to the other. As he already had a concrete base and knew how much work and waiting would be involved using concrete again, Mike decided to use an alternative shed foundation that would be strong, easy to install, ready to use immediately and preferably permeable to help protect his shed from rotting.
Buying 8ft x 6ft Plastic Shed Base
Mike started searching online for alternative shed foundations. He browsed a couple of other sites (blogs and shops) before visiting our website and our fully recycled plastic shed bases. After reading up on our bases many benefits such as: being strong (hold up to 420 tonnes per m²), easy to install, permeable, able to use instantly and UV & weather resistant, Mike ordered an 8ft x 6ft plastic shed base kit. His order was dispatched the same day and arrived at his home within 3 working days.
Installing Plastic Shed Base & Shed
Mike received his shed base and membrane and began work the following weekend. You can follow the installation using the pictures in the blog.
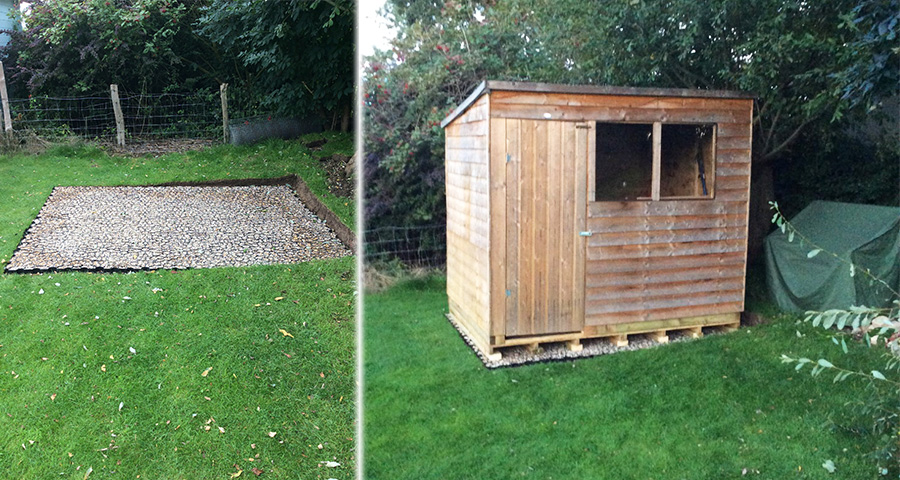
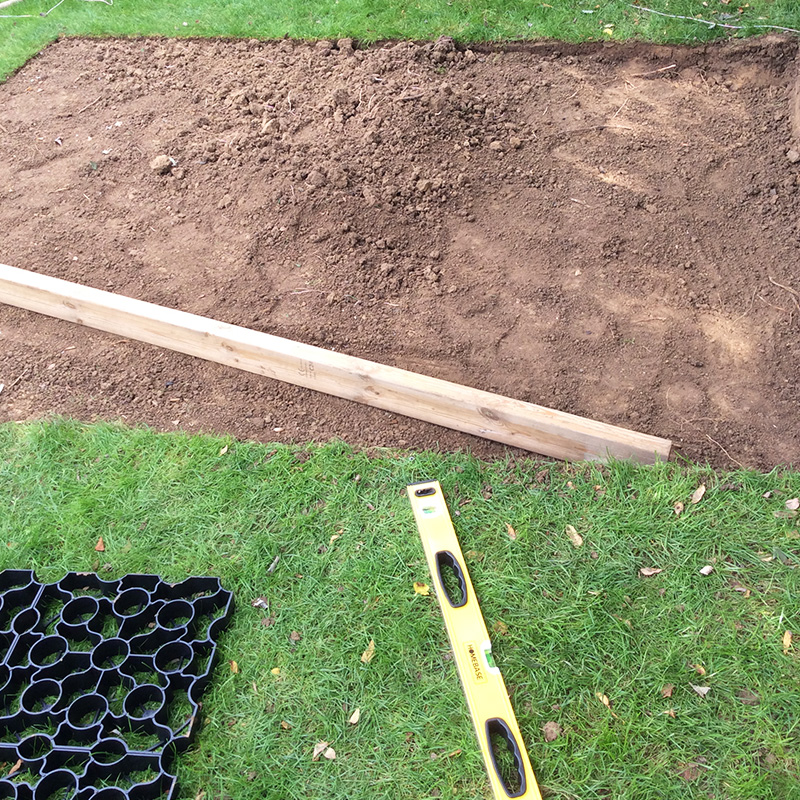
He started by measuring and marking out an 8ft x 6ft area in the area where his shed would be relocated to using string. From here, he removed a layer of turf and soil to leave a flat area where he could begin work on his foundation.
From here, Mike rolled out his sheet of membrane into the dug out area and ensured all of the exposed soil was covered with the sheet before temporarily holding it in place.
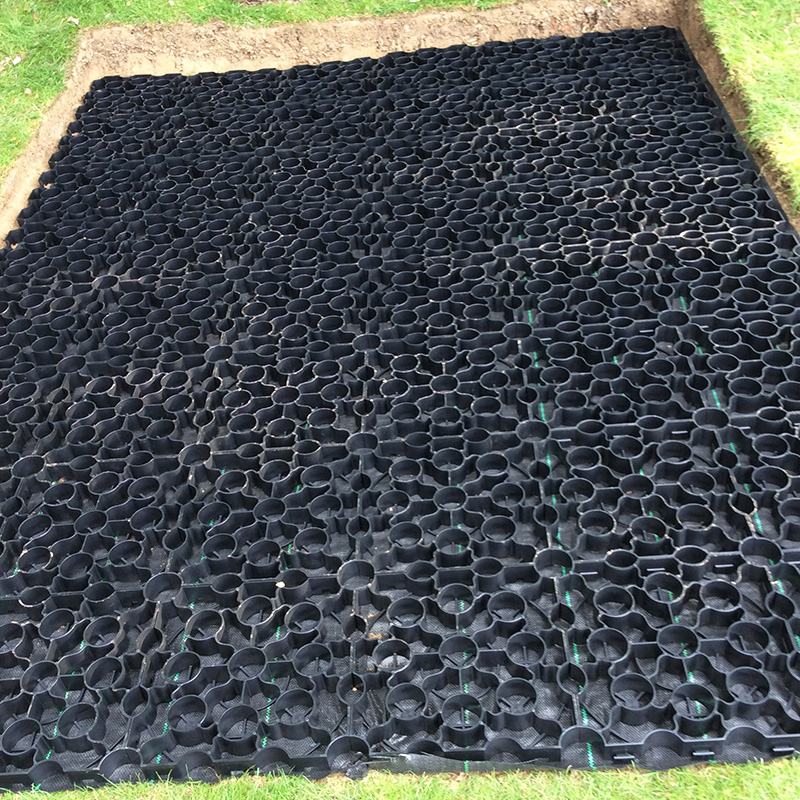
On top of the membrane he could begin installing his plastic shed base. Mike started in a corner and laid one panel at a time and simply connected each neighbouring base panel together using the specially designed slot and peg system. He repeated the process of ‘lay one panel and connect’ until the entire base had been laid which did not take much time at all.
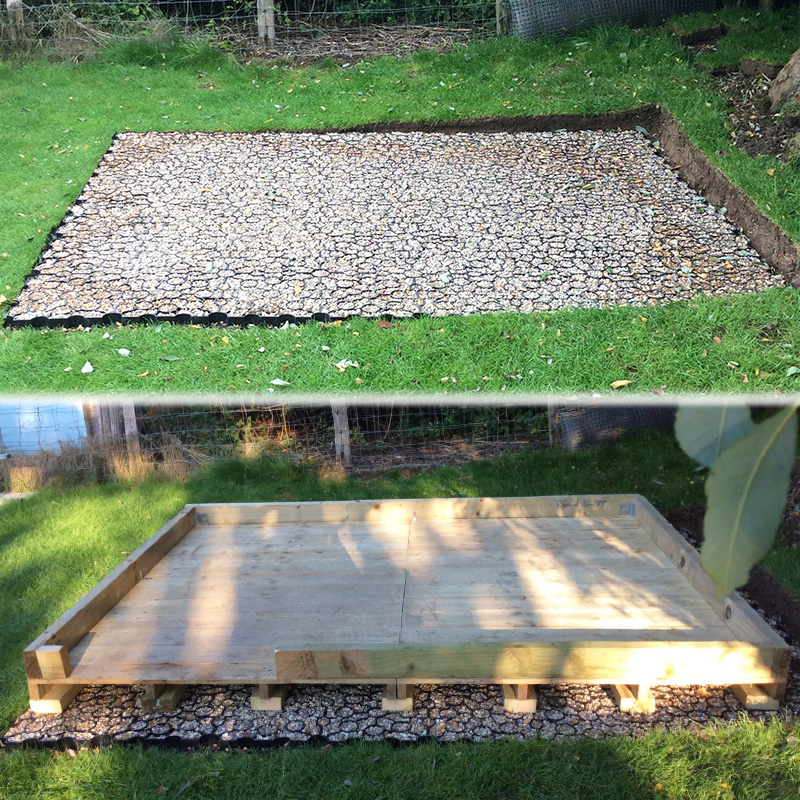
All that was left to do with the base was to fill it with decorative gravel which he did with 10mm gravel. We estimate that 8kg of gravel is required to fill each panel so from this you can work out roughly how much gravel is need for a full base.
With the base complete, Mike could start work on moving over his shed by first installing a raised base which he told us about: “Since I was moving the shed to a new position in the garden, I took the opportunity to make the shed a bit higher to prevent hitting my head on the top of the door opening.”
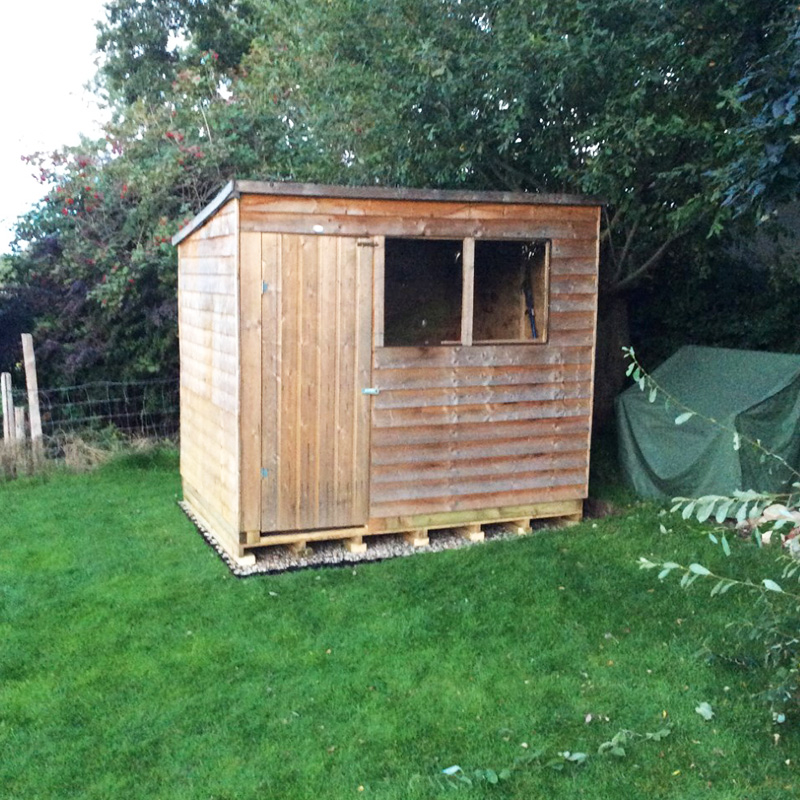
Finally, on to his newly raised shed flooring, Mike installed his old shed and could begin using it again without the risk of his shed rotting or him banging his head on the door frame!
Conclusion
Mike told us: “Your plastic shed base solution enable me to create a shed base in around 4 hours. That includes digging out the turf, levelling, putting membrane down, clipping plastic base together and filling with 10mm shingle. One advantage is that there is no drying time and I could put my shed in place immediately, however with concrete that obviously wouldn’t have be the case. It also helps the shed stay dry and rot free as any water will drain through the shingle.”
A huge thank you to Mike for sharing photos and details of his plastic shed base and shed installation to allow us to create this case study. If you have images of your project to share with us then please do not hesitate to contact us and your garden building could be featured on our website!